Creating Your First AI Blog Post
You need blog content to drive organic traffic, but writing articles from scratch takes hours. Nukipa generates complete blog posts tailored to your business in minutes. Here's how to go from zero to published.
Step 1: Open a Campaign
Every blog post lives inside a campaign. If you don't have one yet:
- Go to Campaigns in the sidebar.
- Click Create Campaign.
- Give it a name like "Company Blog" and set your date range.
Then open your campaign to see its content.
Step 2: Choose How to Create Your Post
You have three options:
Option A: Generate from AI Ideas
- Inside your campaign, click Generate Blog Ideas.
- Choose a content type:
- Insight - Thought leadership, trends, analysis
- Comparison - "X vs Y" or "Top N" comparison articles
- Instruction - How-to guides and tutorials
- Buyer's Guide - Product evaluation and purchasing guides
- Optionally describe what you want the ideas to focus on.
- The AI generates several topic ideas. Pick the one you like and click Create to turn it into a full blog post.
Option B: Create from a Briefing
- Click New Blog Post.
- Choose the content type (insight, comparison, instruction, buyer's guide).
- Write a brief description of what you want the article to cover.
- Click Generate and the AI writes the full article.
Option C: Create from a News Item
- Go to the News section and find a relevant article.
- Click Create Content on the news item.
- The AI uses the news context plus your company profile to generate a topical blog post.
Step 3: Wait for Generation
Blog post generation typically takes 30-90 seconds. You'll see a spinning indicator while the AI works. The post status changes from "generating" to "ready" when it's complete.
You can navigate away and come back - generation continues in the background. Check the Jobs section to see the progress of all running tasks.
Step 4: Review and Edit Your Post
Once the post is ready, click on it to open the editor. You have two editing modes:
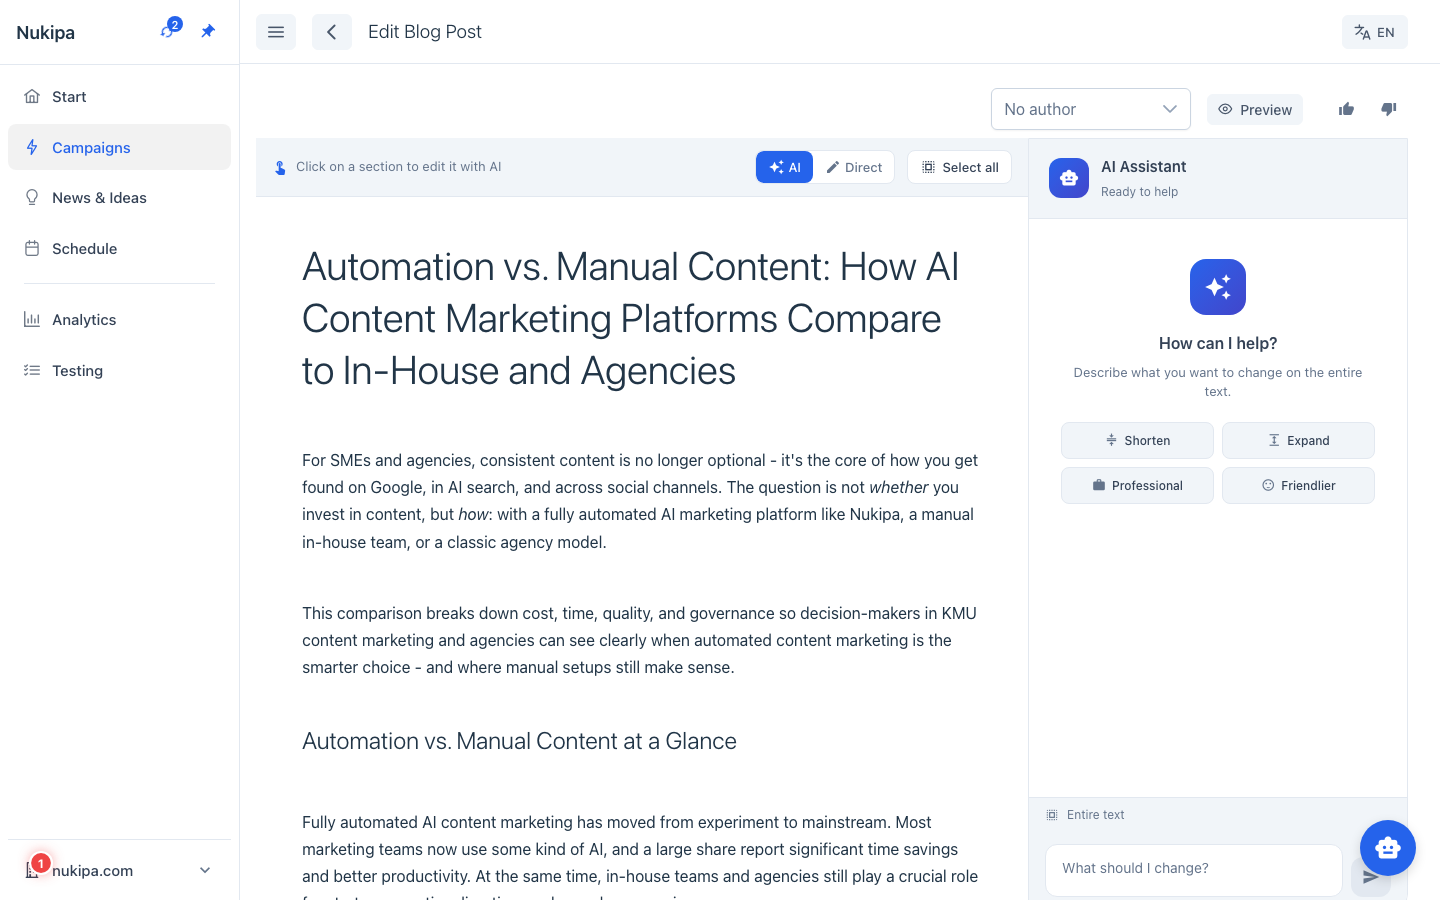
AI Editor (Default)
The AI editor lets you refine content by giving instructions in natural language. For example:
- "Make the introduction shorter and more punchy"
- "Add a section about pricing considerations"
- "Change the tone to be more conversational"
The AI rewrites the content based on your instruction while preserving what's working.
Direct Editor
Switch to the visual (WYSIWYG) editor using the toggle in the toolbar. This gives you a traditional rich text editor where you can:
- Format text (bold, italic, headings)
- Add lists, links, and blockquotes
- Insert images from your uploaded manuals or company assets
Tip: Start with the AI editor to get the structure and tone right, then switch to the direct editor for final polish.
Step 5: Add an Image
Every blog post can have a hero image. Click the Generate Image button (image icon) in the post view. The AI creates a custom image that matches your article's content and your brand colors.
Step 6: Assign an Author
Select an author from the dropdown in the blog post settings. Authors appear as bylines on the published post. If you haven't set up authors yet, go to Authors in the sidebar to create profiles for your team.
Step 7: Publish
When you're happy with the content:
- Click the Publish button in the toolbar.
- Your blog post is immediately visible on your public blog.
- The public URL follows the pattern:
yourdomain.com/blog/your-post-slug
Publishing Options
- Publish immediately - Goes live right away.
- Schedule for later - Set a future date and time. The post will automatically publish at the scheduled moment.
- Batch publish - Select multiple posts and publish them all at once.
Step 8: Create Social Media Posts (Optional)
After publishing, you can generate social media content to promote your article:
- Open the blog post.
- Click Generate Social Media.
- The AI creates a LinkedIn post with hashtags and a link to your article.
Tips for Great Results
- Be specific in your briefing. "How to reduce customer churn for SaaS companies" produces better results than "customer churn article."
- Use the right content type. A comparison article has a different structure than a how-to guide - choosing correctly gives you better output.
- Refine with the AI editor. Don't accept the first draft as-is. Use the AI editor to iterate quickly.
- Translate for reach. Use the translate feature to create versions in other languages and reach new audiences.